For a while now, I wanted to build a mechanical keyboard for myself. For this, I picked the XD84 Pro PCB from KPRepublic, since it seems to be the only 75% keyboard PCB available with USB C connector right now. I don't want to buy any new USB peripherals anymore with a Mini or Micro USB connectors. Also 75 % is just the right compromise for me between keyboard size and usability.
There is plenty of resources available on how to assemble a mechanical keyboard from individual parts. But for this particular PCB, information on how to flash new keyboard layouts was very scarce. The PCB came pre-flashed with an ANSI layout, but I wanted to build an ISO layout keyboard.
So here are steps to get there:
Design your keyboard layout
One can use the online editor at keyboard-layout-editor.com for this step. You can start with my layout. It is already adapted for the ISO layout:
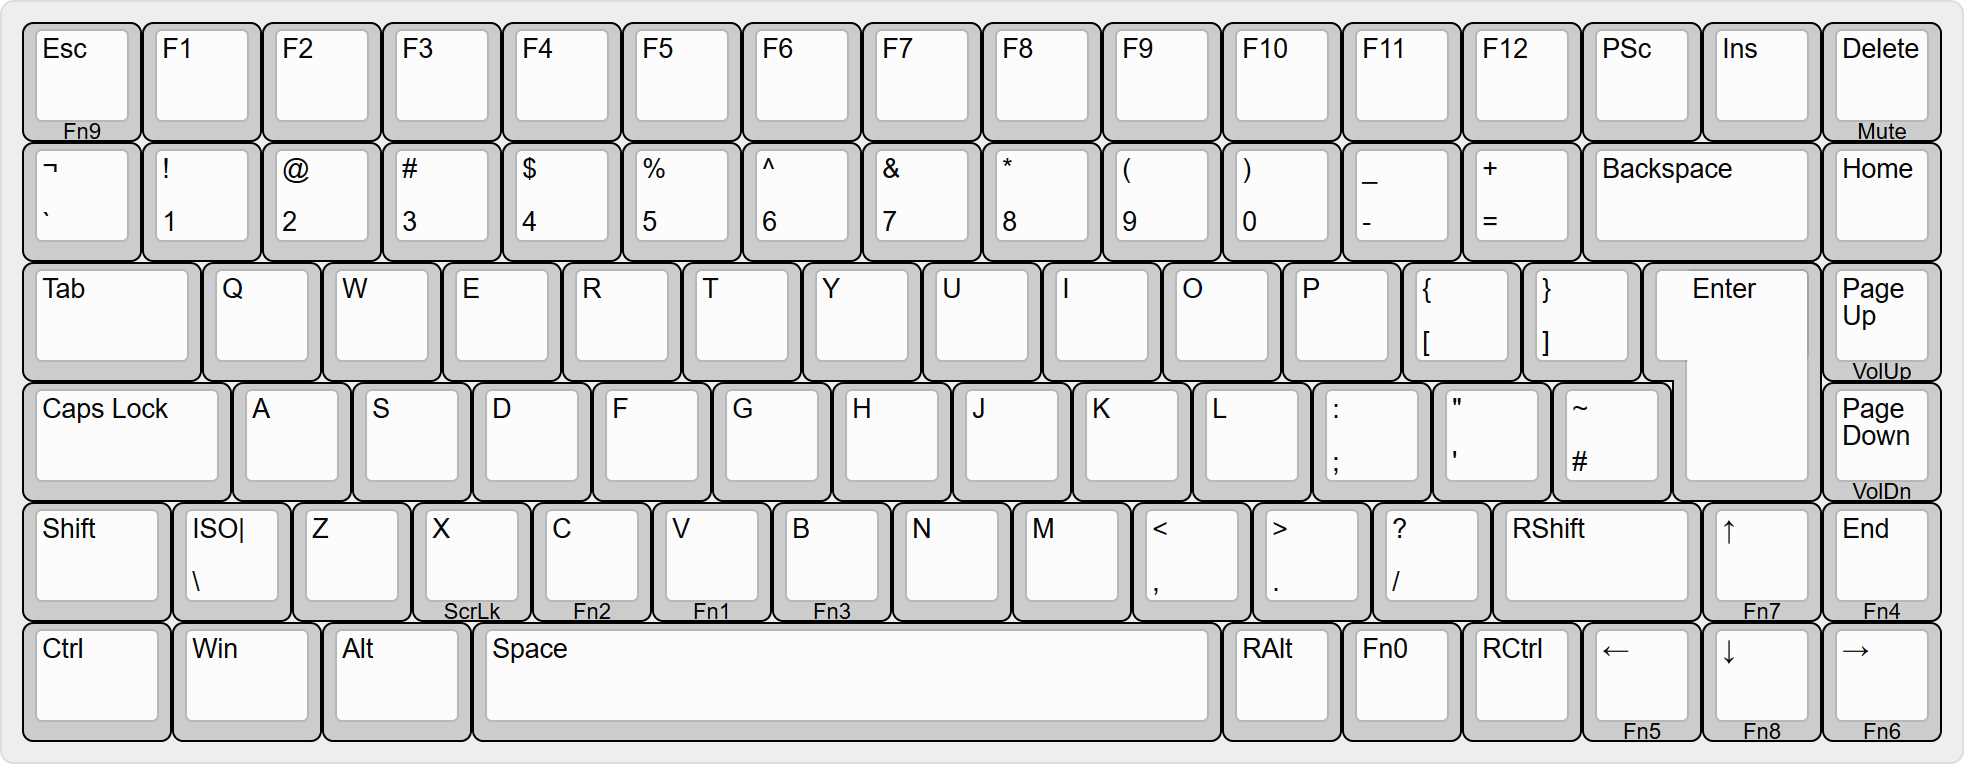
Note the ISO| label on the key next to right shift. Just having | there gives you second #/~ key. Otherwise, you can customize the layout to your heart's content. More details about the process can be found at this excellent blog post.
In the end, all you need is the text data in from Raw Data tab. Copy it to the clipboard for the next step. For reference, here is mine:
["Esc\n\n\n\nFn9","F1","F2","F3","F4","F5","F6","F7","F8","F9","F10","F11","F12","PSc","Ins","Delete\n\n\n\nMute"],
["¬\n`","!\n1","@\n2","#\n3","$\n4","%\n5","^\n6","&\n7","*\n8","(\n9",")\n0","_\n-","+\n=",{w:2},"Backspace","Home"],
[{w:1.5},"Tab","Q","W","E","R","T","Y","U","I","O","P","{\n[","}\n]",{x:0.25,w:1.25,h:2,w2:1.5,h2:1,x2:-0.25},"Enter","Page Up\n\n\n\nVolUp"],
[{w:1.75},"Caps Lock","A","S","D","F","G","H","J","K","L",":\n;","\"\n'","~\n#",{x:1.25},"Page Down\n\n\n\nVolDn"],
[{w:1.25},"Shift","ISO|\n\\","Z","X\n\n\n\nScrLk","C\n\n\n\nFn2","V\n\n\n\nFn1","B\n\n\n\nFn3","N","M","<\n,",">\n.","?\n/",{w:1.75},"RShift","↑\n\n\n\nFn7","End\n\n\n\nFn4"],
[{w:1.25},"Ctrl",{w:1.25},"Win",{w:1.25},"Alt",{w:6.25},"Space","RAlt","Fn0","RCtrl","←\n\n\n\nFn5","↓\n\n\n\nFn8","→\n\n\n\nFn6"]
Prepare for Firmware Flashing
The easiest way to to flash a new firmware to the PCB is to use the website https://xd.tkg.io/. To makes this approach work, a few prerequisites must be taken:
- Download and execute the Zadig app. This app makes it easy to install the Windows driver required to flash the firmware.
- Make sure you have Google Chrome installed and launch it.
- In Google Chome, install the TKG Chrome app. This gives https://xd.tkg.io/ the possibility to directly access USB devices in order to flash the new keyboard firmware.
- Connect the PCB to your computer.
- Look for the two solder pads labeled
RESETnext to the area for the space key. Short them with a pair tweezers. The PCB should reconnect (watch for the Windows notification and the characteristic device unplugged / plugged sound). - Go to the Zadig app you downloaded earlier. Click on Install WCID Driver. With the keyboard already connected and reset, the app is smart enough to pick the correct driver for you.
The PCB is now ready for firmware flashing.
Configure and Flash the Firmware
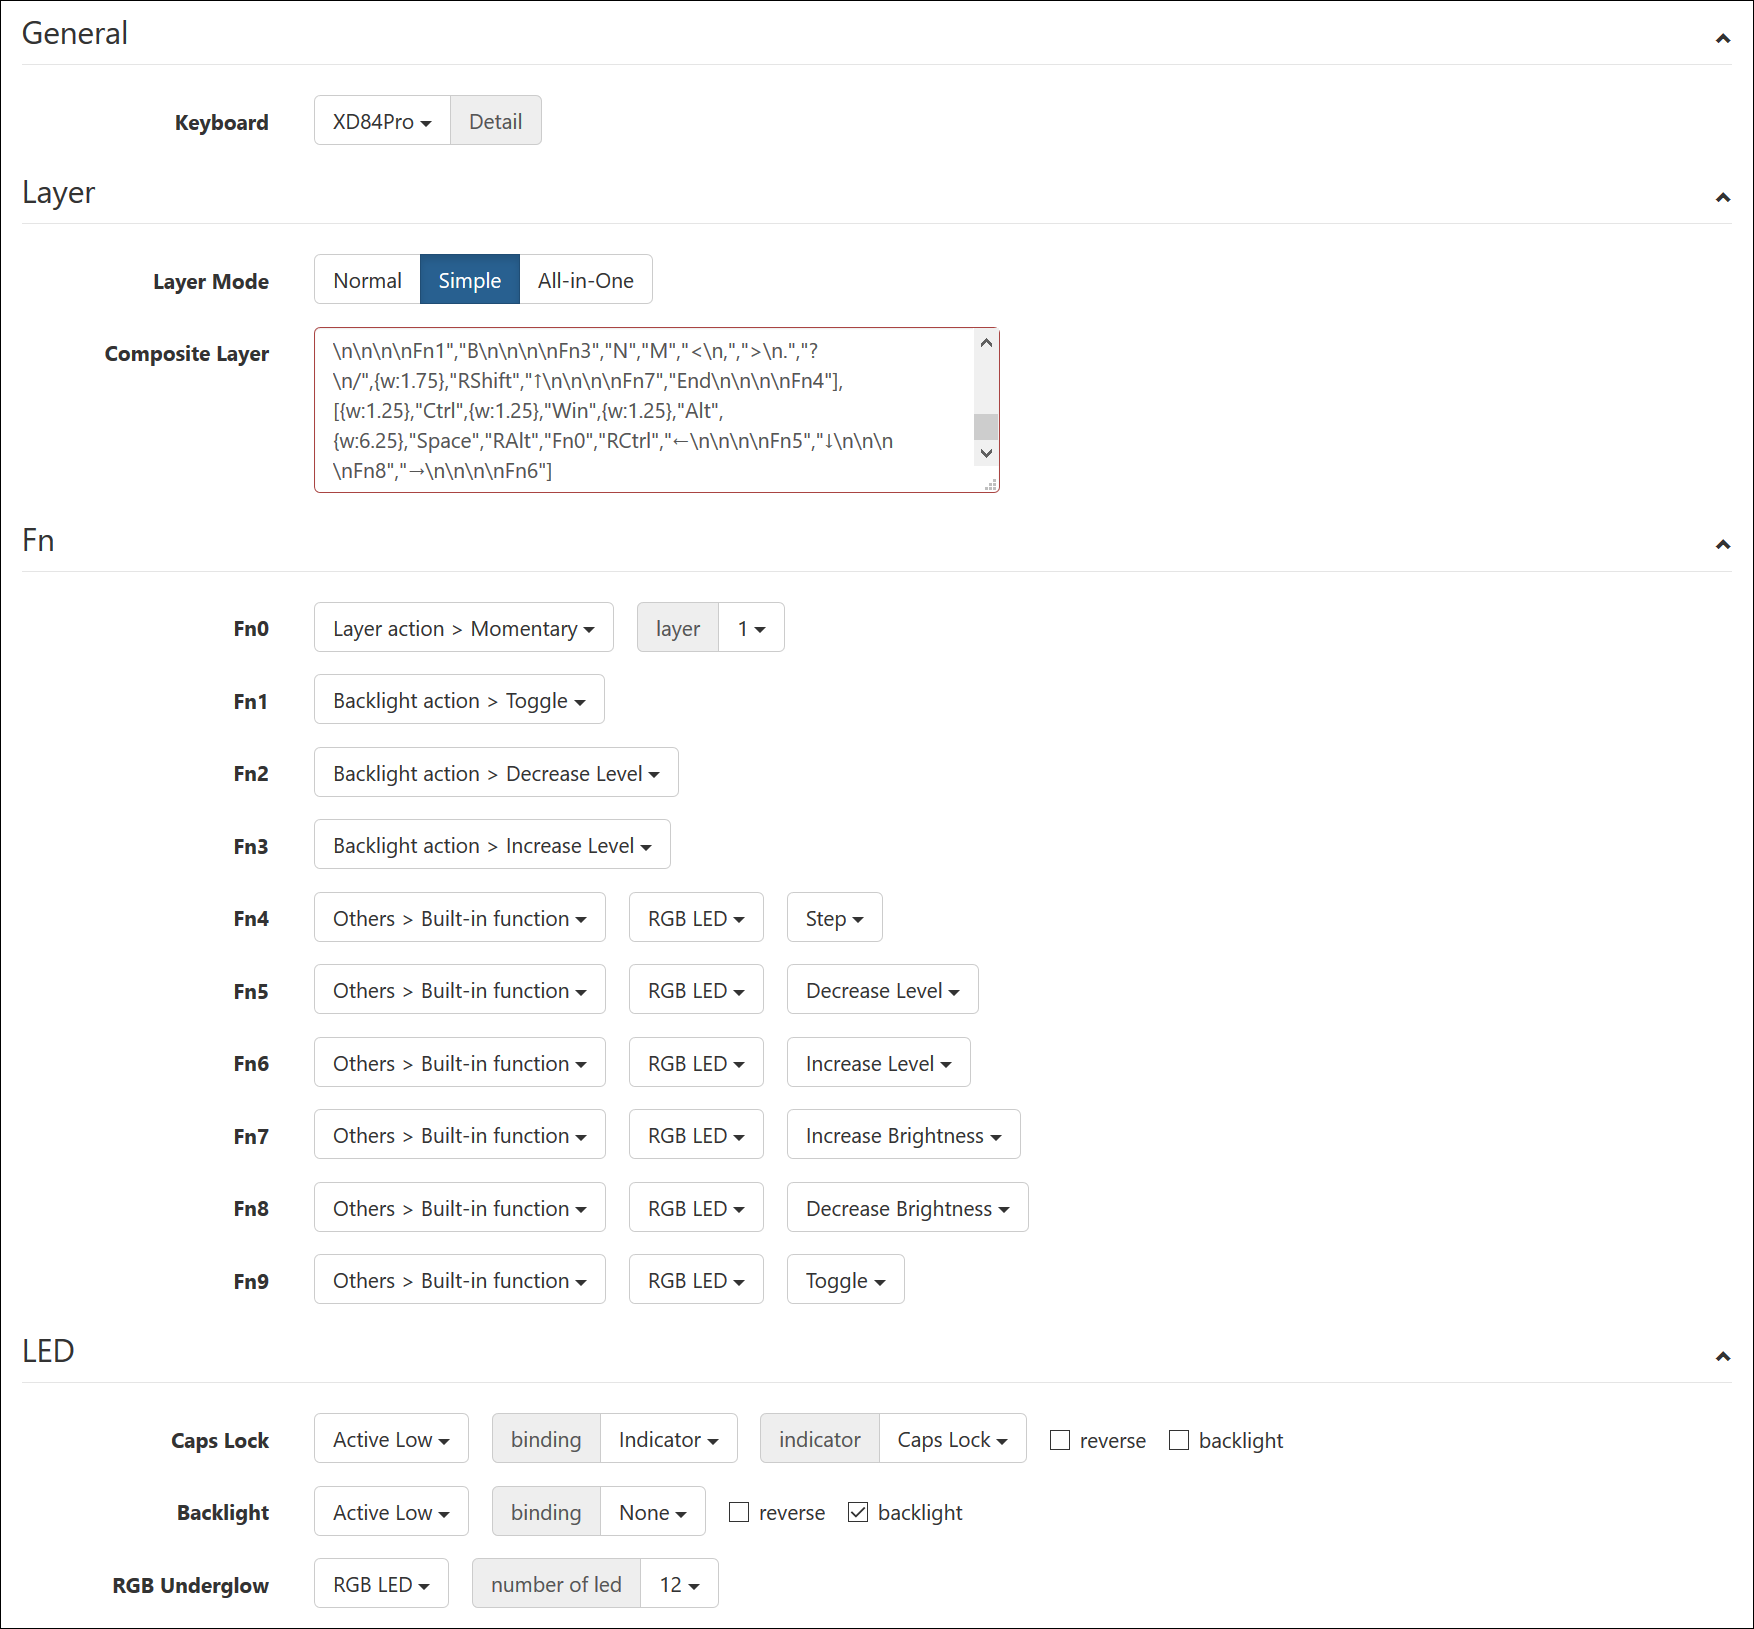
Go to https://xd.tkg.io/ with Google Chrome. First, enable the advanced mode in tools menu in the top right corner. Select XD84Pro from the Keyboard menu in the general section. Then paste your keyboard data in the big text box next to Composite Layer. Finally, you need to configure your function keys. I left them as there are in the default XD84 Pro firmware.
The actual flashing part is really simple. Just click on the green Burn .eep file button at the bottom of the page. After a few seconds the firmware flashing process is completed and the keyboard should be instantly useable with the new keyboard layout. If you are not yet satisfied with your layout and want to repeat the process, you need to reset the keyboard again by shortening the two RESET pads.