
I don't like getting up when it is still dark outside.
In the summer time, this is not a problem. The sun rises much earlier than I usually have to get up. But in the winter time it is a different story. So for a few months each year I have a hard time to get going in the morning. To help with this, I built a sunrise alarm clock.
I am using this alarm clock now for almost a year and so far it has been a resounding success. While the light is not able to wake me up (I still use a second alarm clock for that) I feel considerably more comfortable and awake when the alarm sounds. The transition from being fast asleep to fully awake feels far less abrupt and is in general just more a pleasant experience. My wife actually wakes up from the dawn simulation.
Hardware setup
I still had a original Raspberry Pi model B lying around waiting for a return from retirement. My basic idea was to connect it to a RGB LED strip to simulate an artificial sunrise.
There are many kinds of LED strips available, but the family of LED strips based on the WS2801 LED driver are particularly popular for DIY projects. They are cheap, decently bright and each LED can be controlled individually offering 24 bits of color depth. Programming is done over SPI, a simple serial data interface. It allows one to control the complete LED strip over only two wires. The Raspberry Pi supports SPI natively through its GPIO interface. Thereotically, one has to accommodate the different voltage levels of the Rhaspberry Pi and LED strip. The GPIO of the Rhaspberry Pi operates at 3.3 V while the data lines of the LED strip expect 5 V. The correct solution would be to use a level shifter to translate between the different voltages. For me, it worked just fine without the the level shifter.
For my setup, I have ordered 10 m of such a LED strip to build simple low-res LED screen. I have divided the strip into ten 1 m sections which I mounted on peace of plastic ventilation pipe. The pipe is almost white reflecting most scatter light back to the lamp shade. It also offers enough space to hold all components in its internal area. The pipe itself is attached to the core of an old IKEA floor lamp from which I also reused the lamp shade. The end result is indistinguishable from the original lamp as long as you don't switch it on.
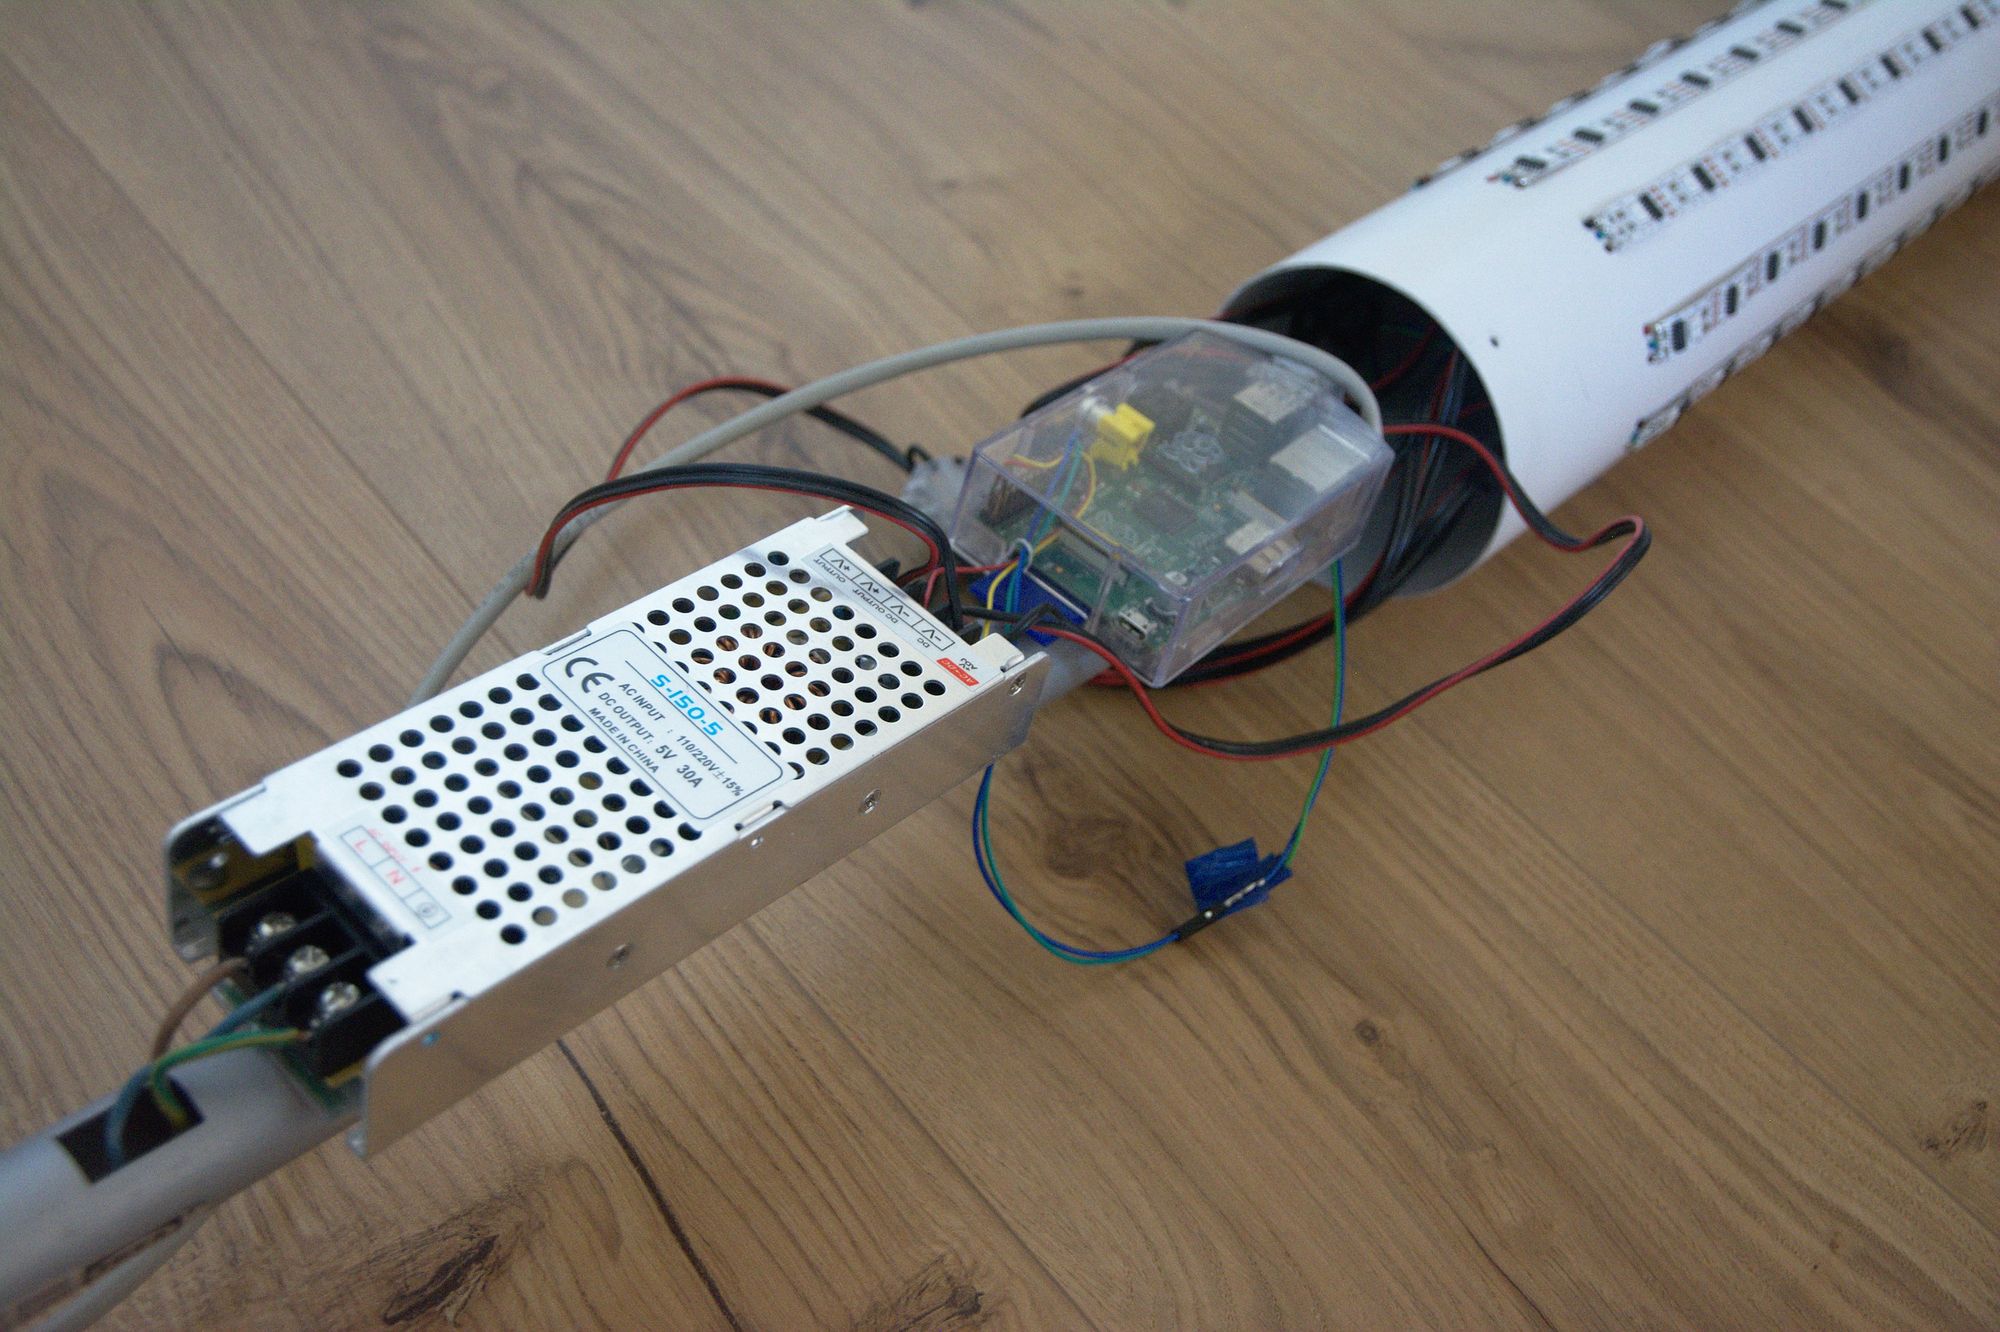
320 LEDs consume a lot of electrical power at maximum brightness. The type of LED strip I have used draws up to 75 mA per LED. At 5 V this gives a maximum total power consumption of 120 W for the whole LED strip. To have a little headroom I used a 150 W power supply. This one has enough reserves to also power the Raspberry Pi so I don't need a dedicated unit for it.
With this, I had an circular, fully-programmable LED screen with a resolution of 10×32 pixels in guise of a regular floor lamp.
Software
Designing and building the hardware setup was a big part of this project, but only the first step toward a usable result. Fortunately, I am much more experienced with building software than hardware.
For the first version I wanted to reach two very basic goals:
-
make the lamp perform a dawn simulation at programmable times, and
-
provide a user interface to set the alarm times in a comfortable manner.
For the first goal I have chosen to implement a little Python daemon. Its main duty is to wait until it is time for a dawn simulation and then program the LED strep accordingly.
The most challenging part was the display logic for the LED screen. Basic control of the LED screen is super-easy. There are several libraries available which let one directly set pixel values of the LED strip. But getting pleasant results is more complicated than that.
The first hurdle to take is the nonlinear response of the LED strip to luminance changes. Changes in low intensity range are much more apparent than changes near the full light intensity of LEDs. To produce a smooth gradient which doesn't jump almost instantly to full intensity, I had to implement gamma correction. This is a nonlinear transformation of the luminance values to accord for the logarithmic response of our eyes to light.
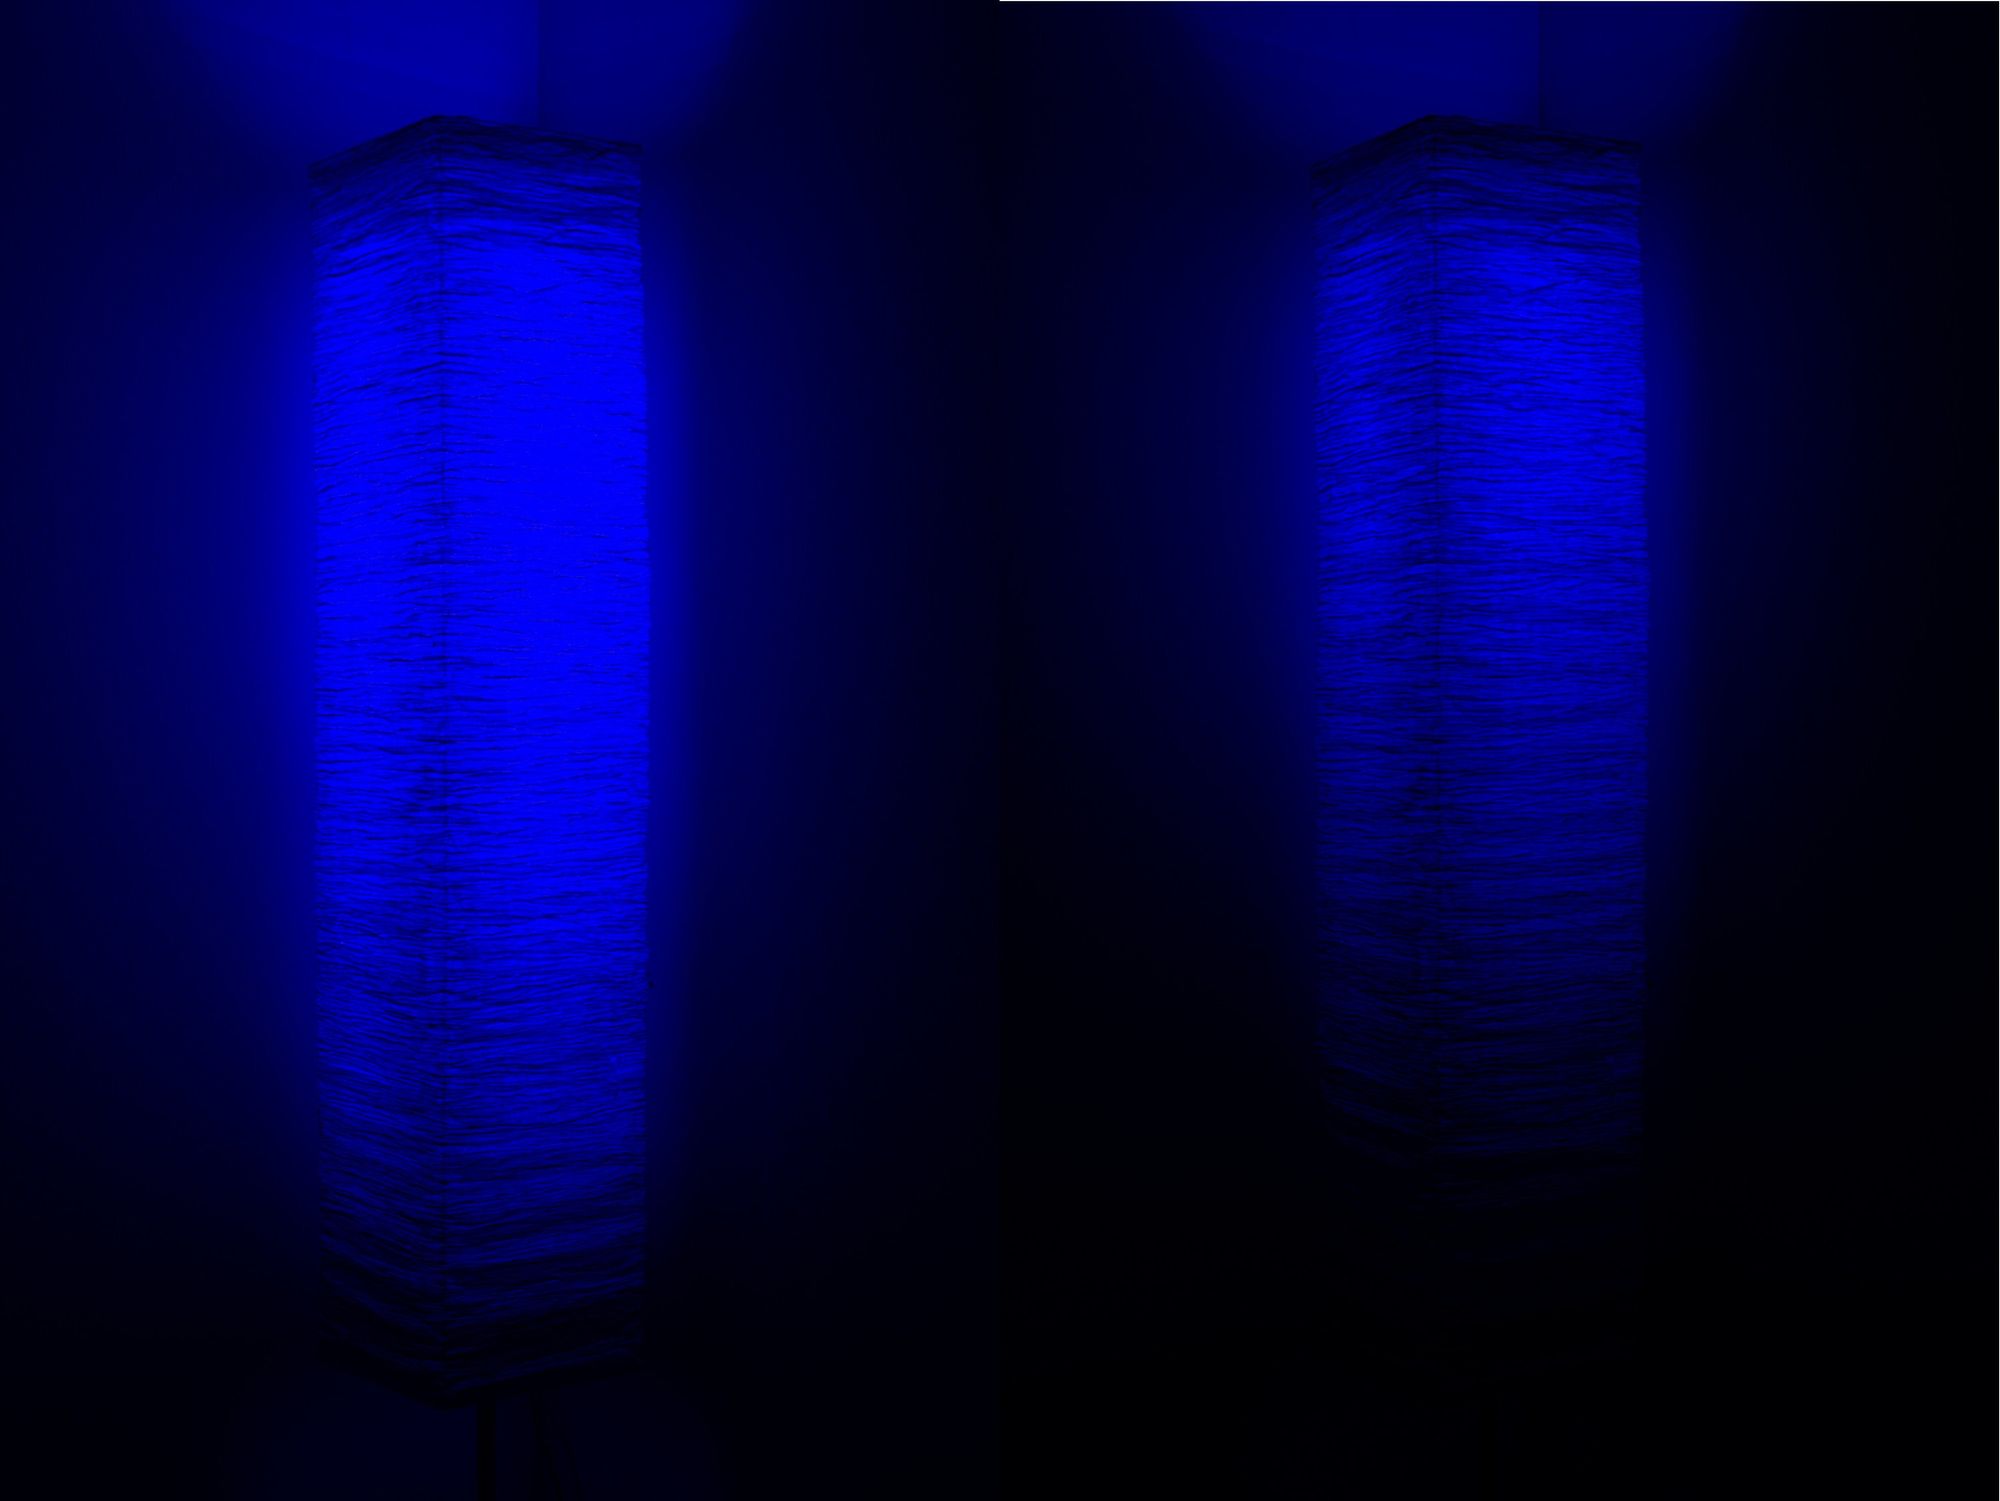
The next issue I have noticed when I tried the lamp in a dark environment for the first time is the huge perceived difference between a dark LED and a LED shining at very lowest possible intensity. Since the lamp should render a smooth transition from total darkness to full intensity, this is problematic. To gain a little bit more fidelity at the lowest brightness levels, I have implemented ordered dithering. It is a simple algorithm to display color graphics on a display with a lower color depth than actually necessary by changing the pixel values slightly in certain patterns to reduce the overall quantization error. It was really popular when monitors could only display 16 or 256 colors. While the LEDs support more than 16 million different colors, dithering still helps at the lowest brightness levels because of the strong non-linear response.
For the user interface I have implemented a web interface optimized for smartphones. It supports setting up alarm times and also acts as a light switch to turn the lamp on or off manually.
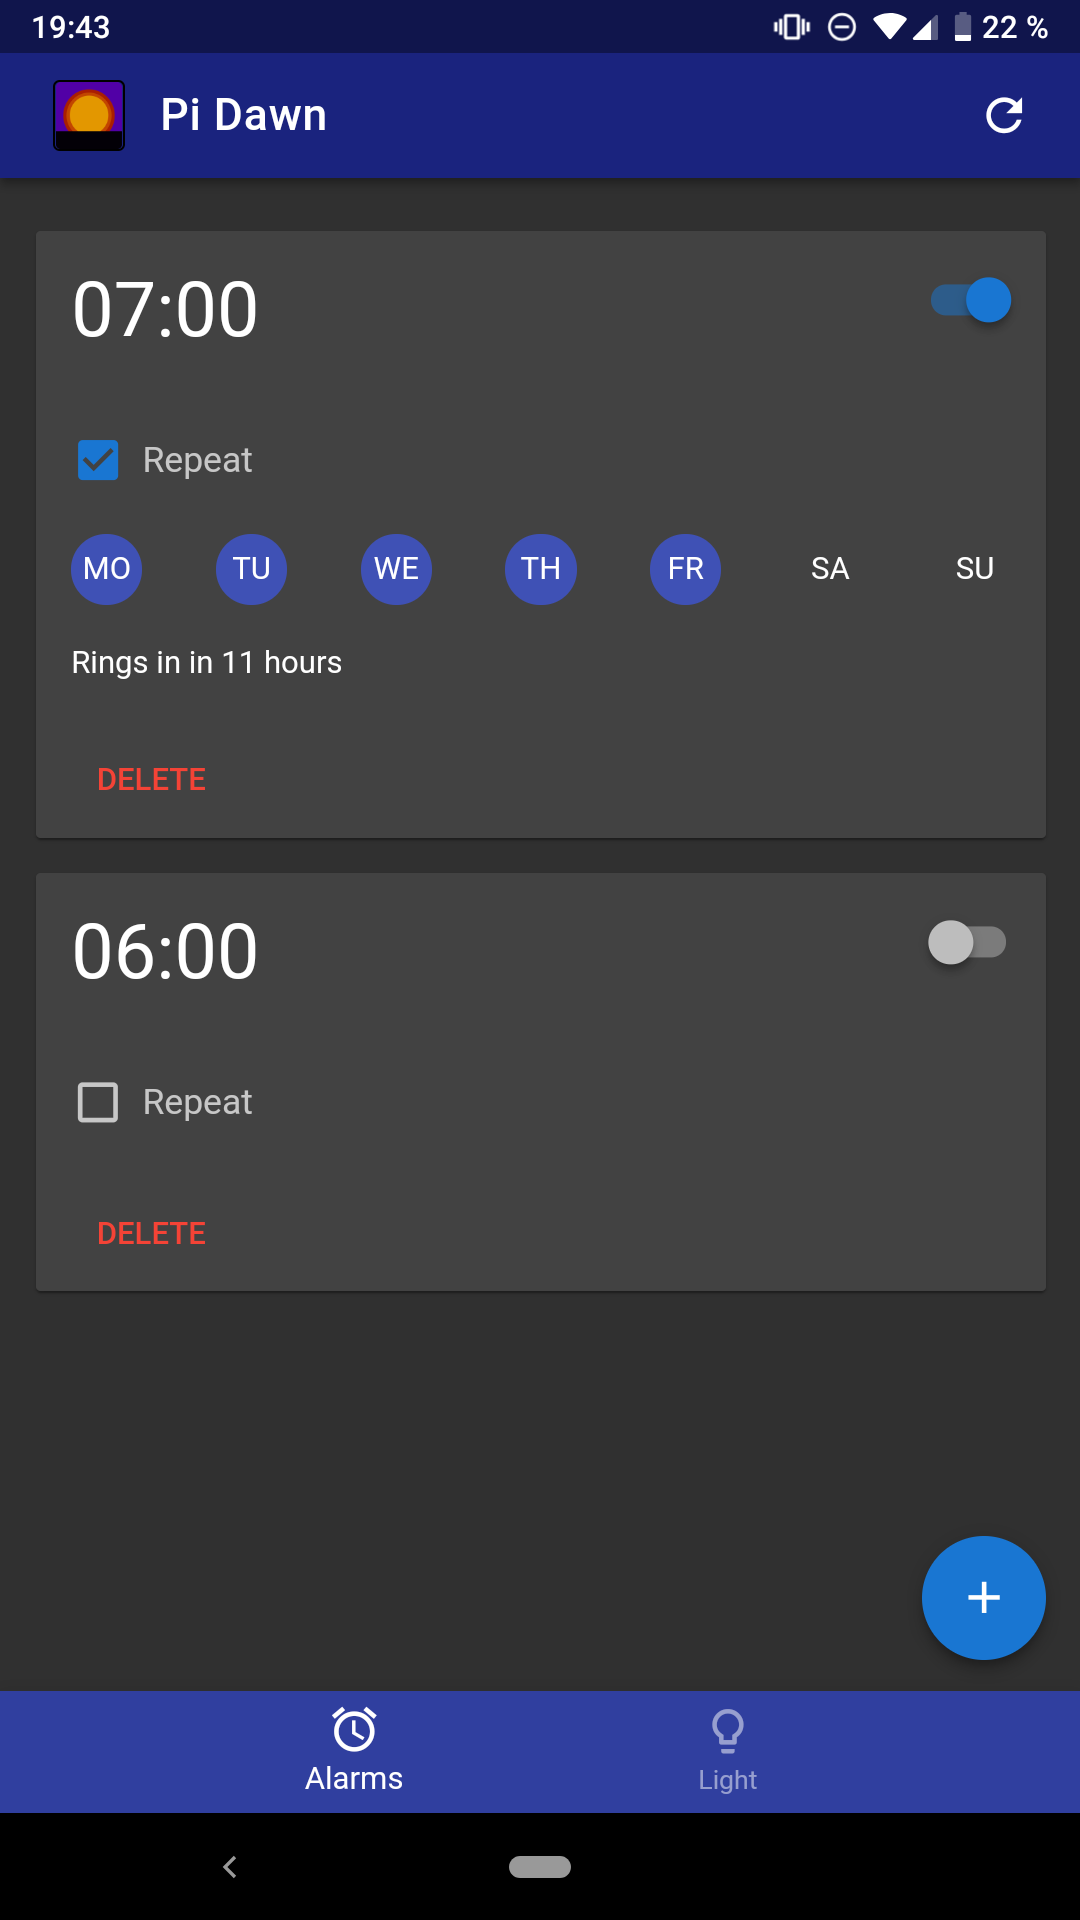
I have implemented the web app with leightweight Python web framework Flask. It provides a Restful web API to control the lamp's functions. This API is used by a single page app which hosts the UI code. This was the first time for me after a long break from client-side programming to do JavaScript programming again and to me it was a mixed experience. Especially choosing a framework and getting used to todays JavaScript development tooling is more difficult than it should be. In the end, I picked Vue.js plus the Vue.js Material Component Framework to built the UI. It is quite impressive with how little code one gets decent results, but getting there can be quite a headache for the uninitiated.
The web app needs a way to talk the alarm daemon, preferably with as little delay as possible. I chose Redis to implement a simple message queue. The web app puts messages for the alarm daemon for state changes (e.g. a new alarm) on the queue. The daemon consumes messages from queue and reacts accordingly. Using Redis on such a low power environment like the original Raspberry Pi was actually a pleasant surprise. It is significantly better performing than the small SQLite database I use to store the alarm times. A commit to this database often causes a short but noticeable freeze because of the fsync calls SQLite uses for atomic updates. Adding an event to Redis queue is always instantaneous.
Build your own
All the source code and the setup instructions are available on Github. Have fun!